If you’re looking to do some simple maintenance on your vehicle that will help to keep it running smoothly and efficiently, a new fuel filter is a great place to start. We will run through on how to change a fuel filter in this article. Your fuel filter screens out junk from the fuel such as paint dirt, rust, etc. that gets put into the fuel line from standard operation and filling up your tank at the pump. The better it is at its job the cleaner and more efficiently your vehicle will burn fuel, providing better mileage and so on. They are relatively inexpensive and easy to replace yourself. Depending on how old and clogged your fuel filter is it could easily pay for itself in savings at the pump, too!
First thing on how to change a fuel filter
First things first, you’ll want to make sure you have everything ready to go, including: a new fuel filter, a wrench set, some rags, and eye protection for safety. Turn your car off and make sure it’s cool to the touch. This may take an hour after driving the vehicle last. The first step is extremely important: relieve the fuel system pressure by removing the fuel pump relay/fuse. Fuel injector systems operate under pressure, so removing the fuel lines can lead to some very dangerous results if not properly relieved first. To do this, locate the fuse box inside of the cabin of your vehicle, often located to the left of the Steering Wheel near where your left knee will be resting while driving. There will be a clearly labeled “fuel pump” fuse on the diagram inside the fuse box; remove that fuse and set it aside in a secure location. If you don’t have a fuel pump fuse, you’ll want to locate the relay nearby. Refer to your owner’s manual for your specific vehicle to locate it. Once the fuse/relay has been removed, start your vehicle. This will use up all of the pressure in the fuel lines and the engine should shut off shortly after due to lack of pressure in the fuel lines. The rest of the steps on how to change a fuel filter are fairly straight forward and safe once the pressure has been removed, so the hardest part is over.
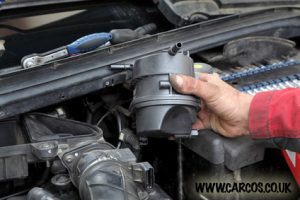
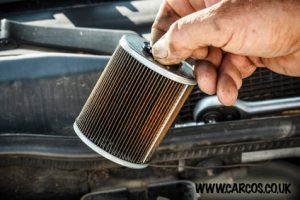
Once you’re confident the pressure has been relieved and the engine has shut off on it’s own, it’s time to remove the old fuel filter. Locate the filter (again, refer to your manual as the location can vary from make and model). Once located, take the open end of a wrench and fit it to the fuel filter side. Take a second wrench, which is usually a different size, and put it on the bolt on the end further from the filter. Place a rag over the fuel line to help prevent and splashing or dripping on you or the surrounding components. Turn the wrench that’s not closest to the filter until it comes out and slide the fuel line off from the bolt. Set the bolt aside in a secure location. Repeat this process for the other side of the filter; there shouldn’t be any major issues in the process. In most cases you can simply remove the filter from there, but some vehicles have it clamped in place which can be removed with a flathead screwdriver. Be careful when handling the filter at this point because it will most likely have some petrol inside of it.
Put the new filter in place and connect the old lines. Replacing the fuel filter is essentially the removal in reverse. Make sure you connect the old filter using the same bolts and process you used to remove it. Make sure the bolts are tight and secure and that the fuel filter is snug in place. If it was clamped in initially, make sure it’s fit snugly in the clamp. Once everything has been double checked, simply replace your fuel pump/relay and start the vehicle. Let it idle for a minute before taking it for a quick test drive.
You now know how to change a fuel filter
Congratulations, you’ve saved money by replacing your fuel filter on your own and will be enjoying better mileage assuming your old one was clogged! Stay tuned for our next vehicle maintenance tip.


